One common maker activity, paper circuits, can be adapted to support a variety of learning outcomes, learner entry-points, content objectives, and audiences. In this module, you’ll analyze examples and accounts of different paper circuit activities and consider the roles that different variables in the design of the activities play. Finally, you’ll practice making adjustments to an activity to support a learning outcome tailored to your own learning environment.
![]() Explore
Explore
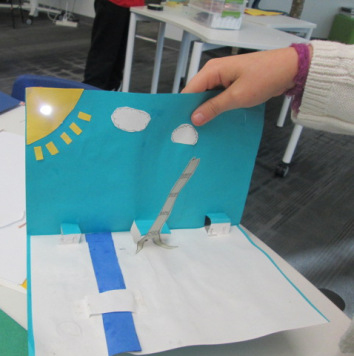
Paper circuits is an activity with simple, easily sourceable materials that engages learners with basic circuitry. Below are three different examples or accounts of lessons or activities that use paper circuits. Each leverages from the same set of materials and explores a similar field of content, but does so in very different ways and to very different ends. Read all three and record your noticings.
![]() Reflect
Reflect
As you explore each, consider and answer the following questions:
- What are the intended learning outcomes of each lesson or activity?
- How does each lesson or activity balance step-by-step instruction with open-ended exploration?
- What knowledge and/or experience is assumed on the part the learners?
- How do you imagine each lesson or activity is facilitated?
- What are the most salient differences between the three?
![]() Notice
Notice
Choose one of the above three lessons or activities to consider further.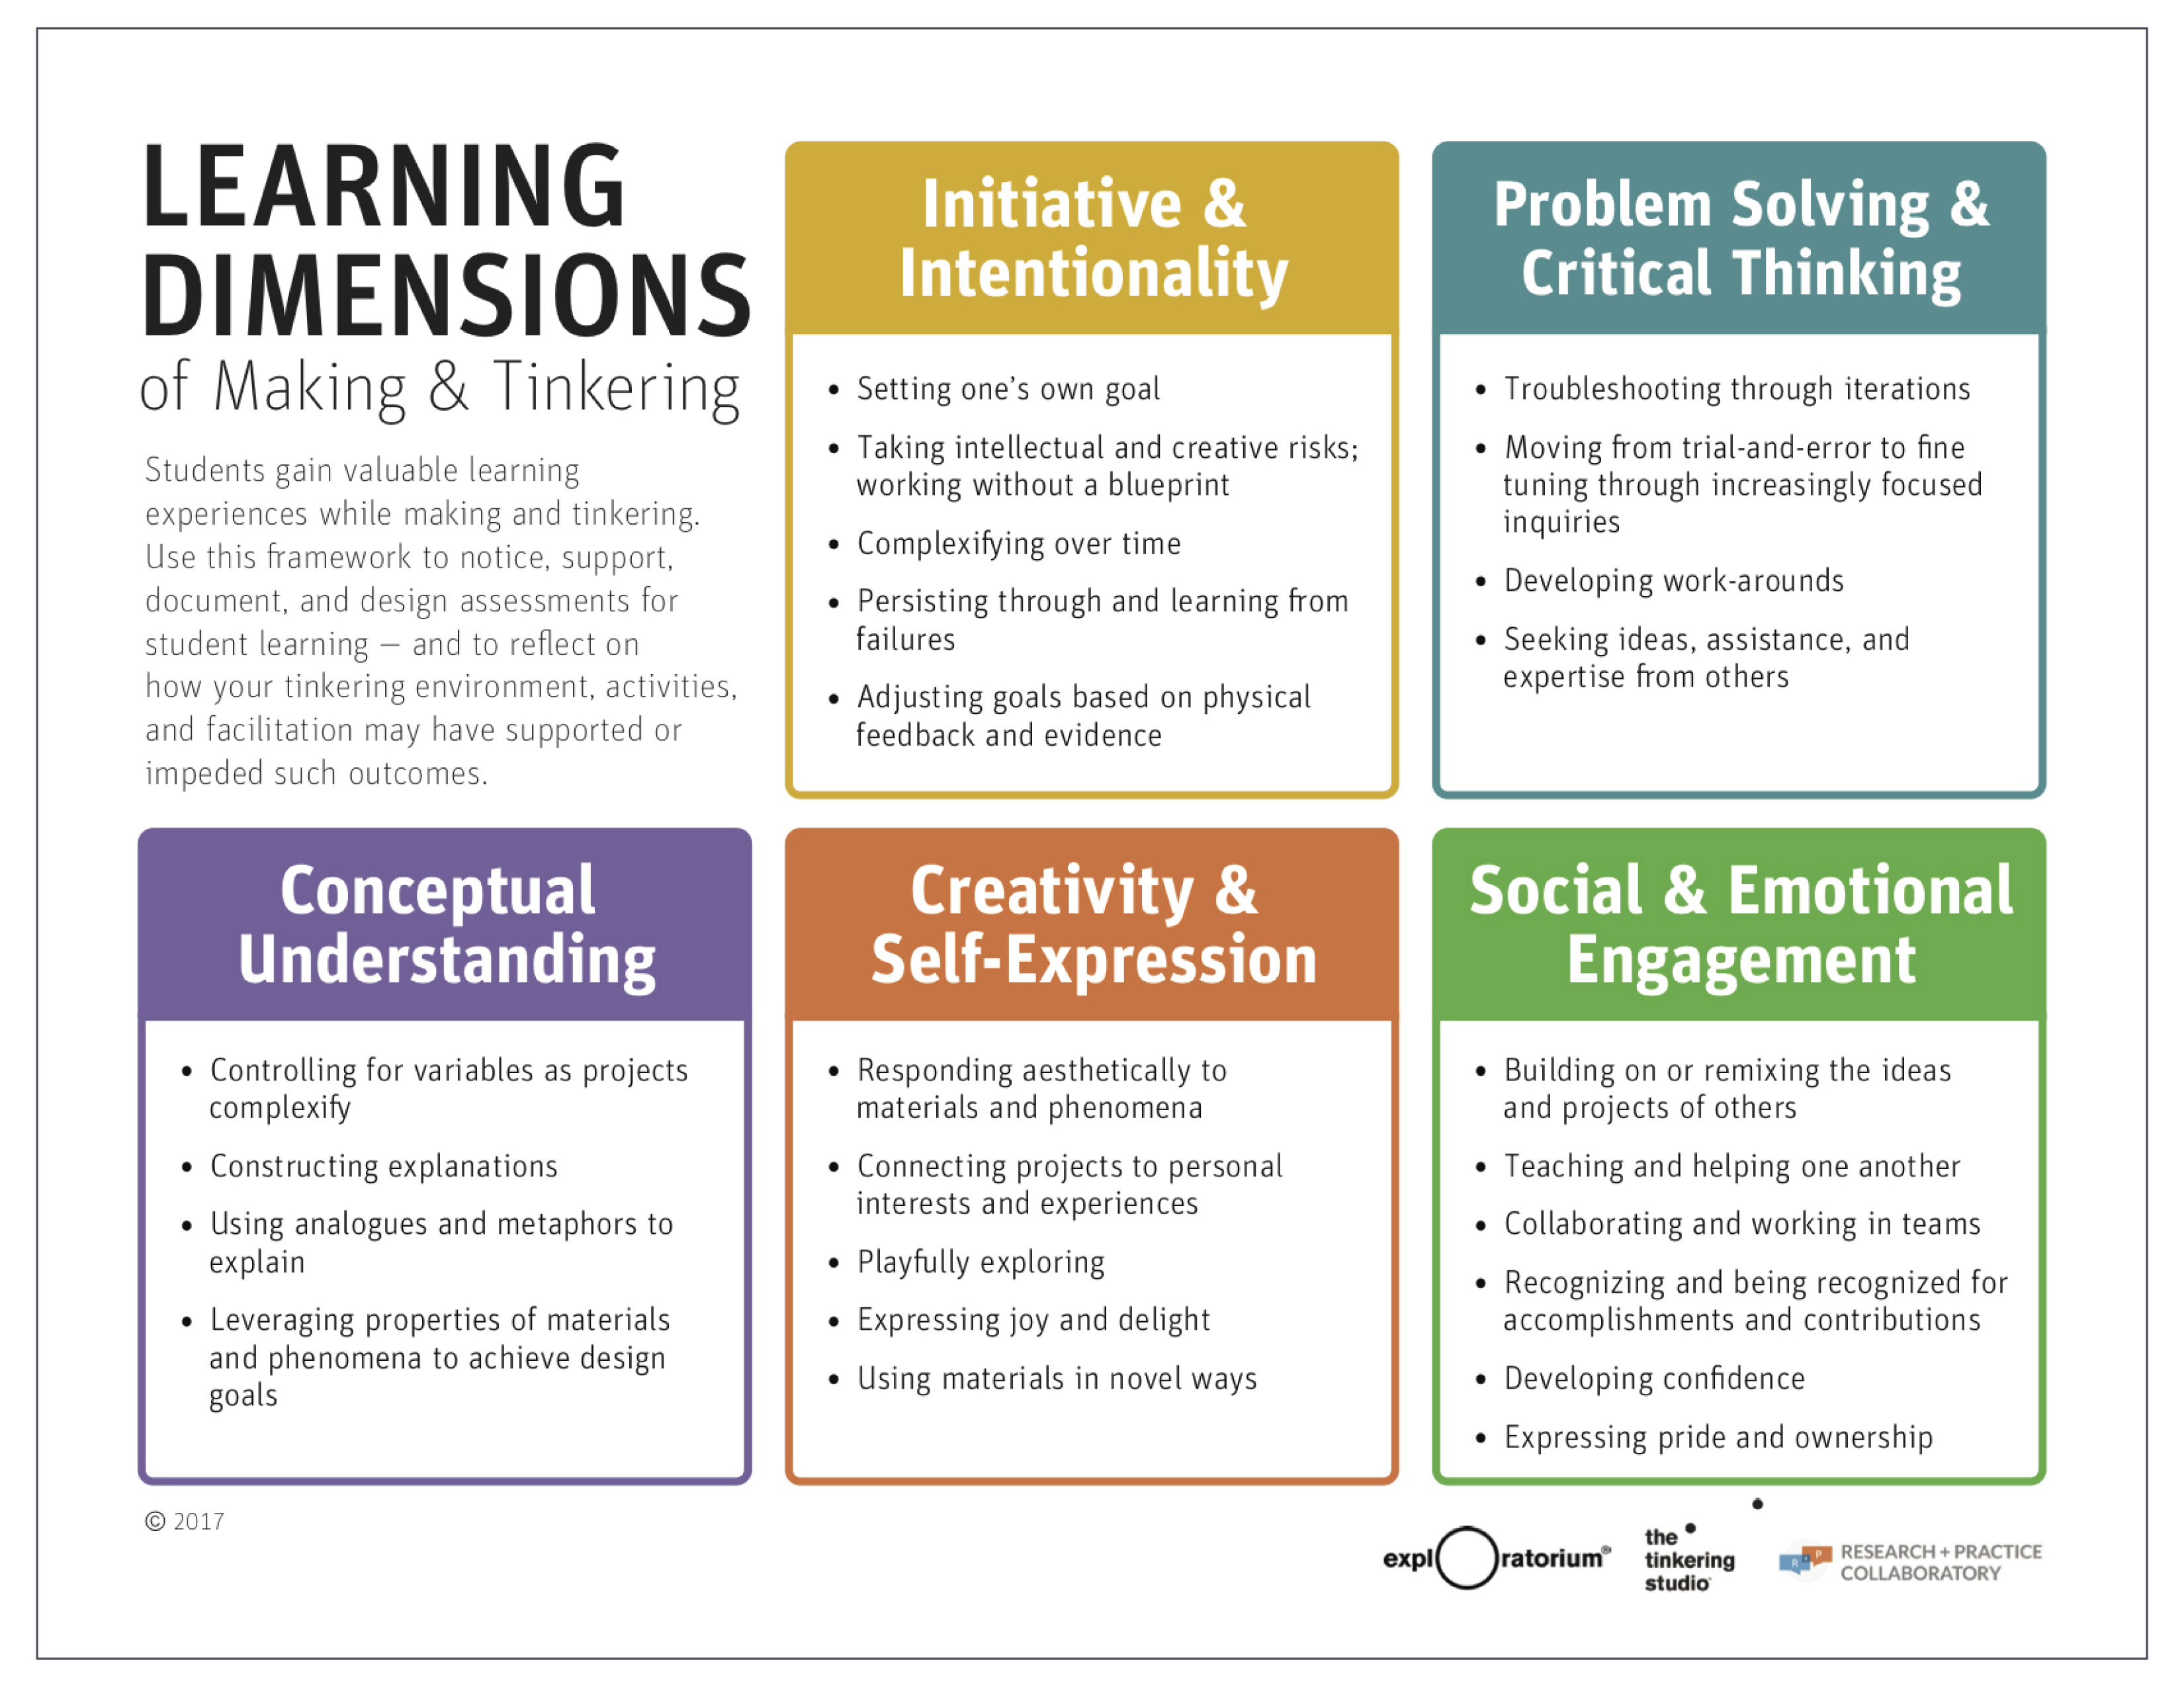
Review The Exploratorium’s Learning Dimensions of Making & Tinkering. Which dimension(s) do you think are supported by this activity and how do you imagine that they show up? Write out one or two examples of visible evidence that you’d look for—whether it’s a behavior or an aspect of a student project—that correlates with the dimension(s).
In order to imagine some of the other variables that came into play in the design of this activity, take a look at the Pieces & Parts Tool (page 13).
This tool, a part of the Making Spaces Toolkit developed by the Children’s Museum of Pittsburgh in partnership with Maker Ed, was created to aid educators in program and curriculum design by surfacing key considerations related to each and representing them as spectra. Plot where you think this activity falls on the spectra under “Activities” and “Tools, Materials & Equipment.”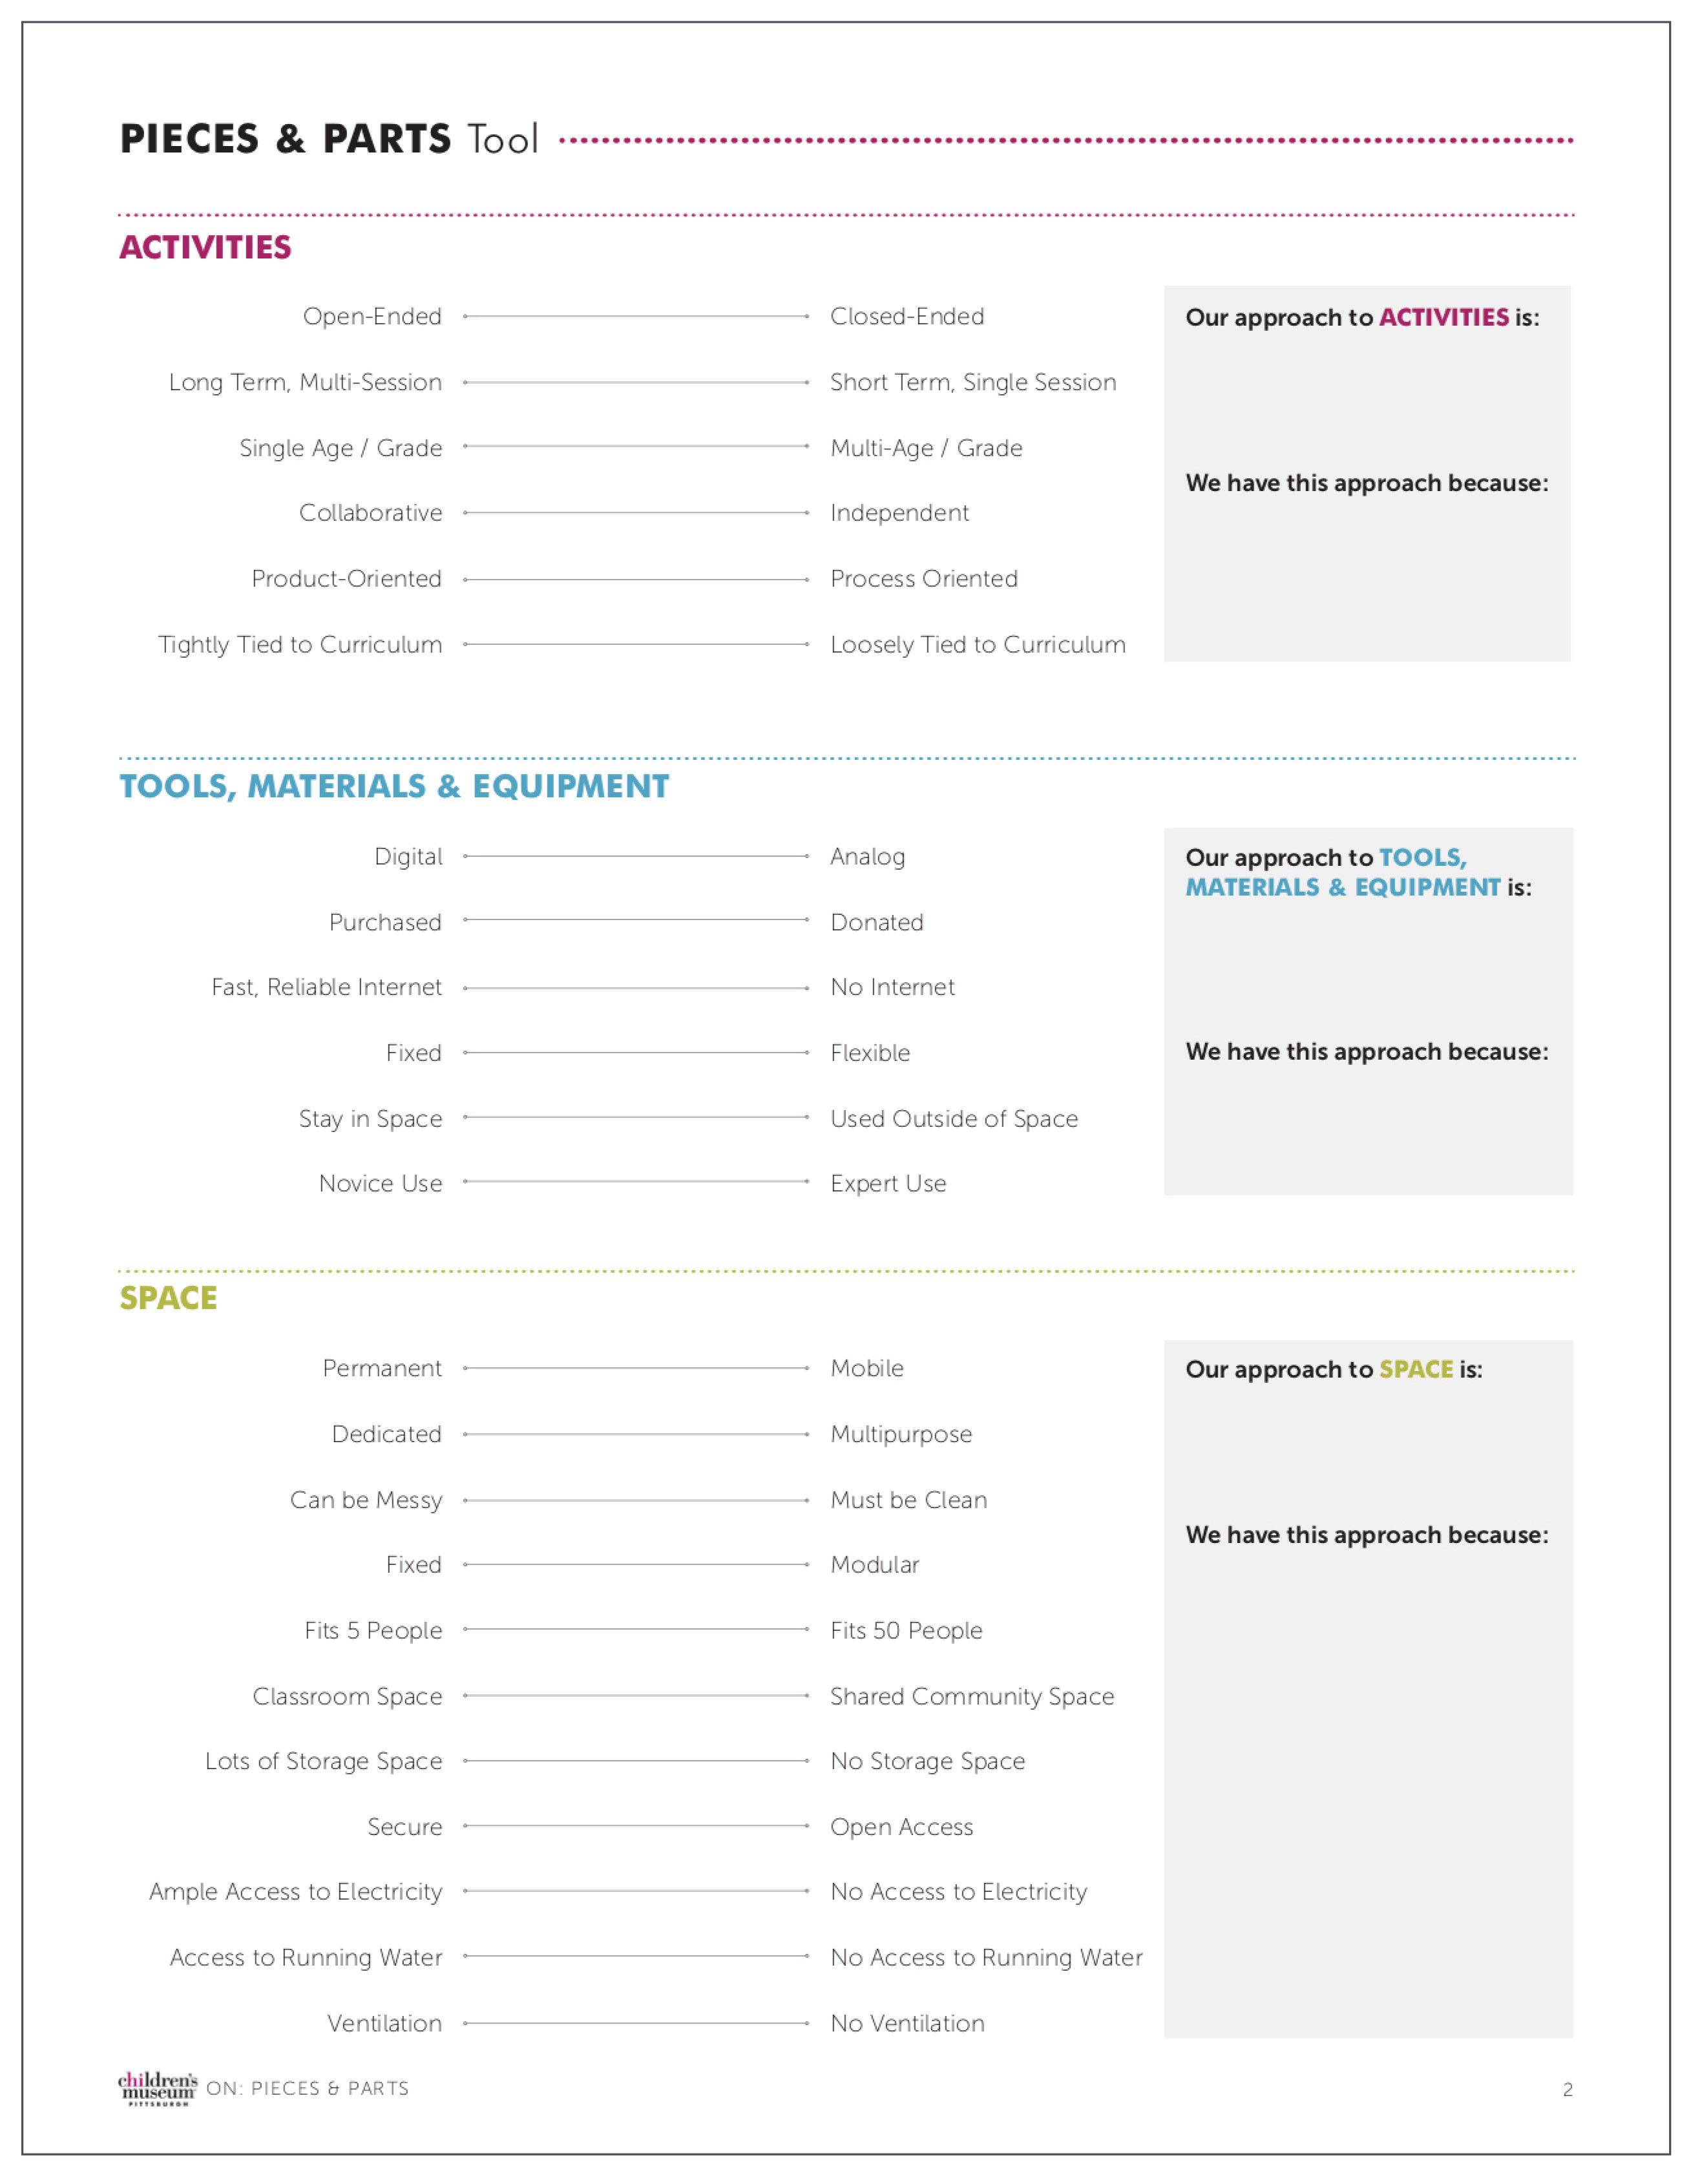
![]() Apply
Apply
Continue to hold this lesson or activity in mind.
Identify one of your own learning outcomes and one Learning Dimension from above that you’d like to see for your learners, and begin to remix the chosen paper circuit activity to support those desired outcomes. What would you change?
![]() Explore
Explore
Are you looking for more opportunities to practice weaving maker-centered learning into your learning environment? Take a look at these related modules:
This module was developed in collaboration with Goli Mohammadi (editorial) and Kim Dow (design). Maker Ed would also like to thank Schmidt Futures for supporting the creation of these learning modules.